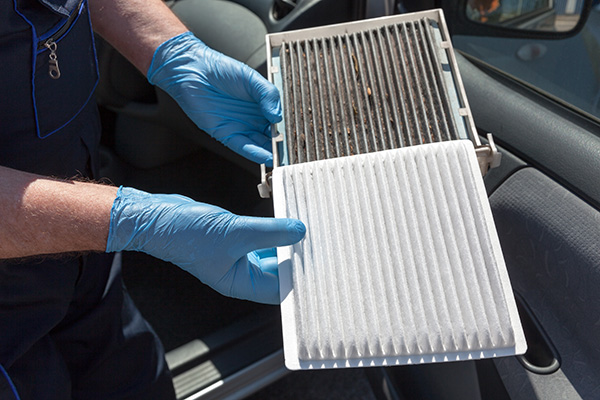
Replacing your car's air filter at home might seem daunting, but it's simpler than you think. With the right tools and a little guidance, you can save money and time by doing it yourself. But is it really that easy? Let's see how you can replace your car's air filter at home, ensuring your vehicle runs smoothly and efficiently.
Why Replace Your Car's Air Filter?
Your car's air filter plays a crucial role in maintaining engine performance. It filters out dirt, dust, and debris from the air entering the engine, ensuring clean air mixes with fuel for optimal combustion. Over time, the air filter gets clogged with contaminants, reducing airflow and affecting engine performance. Replacing it regularly keeps your engine running at its best, improves fuel efficiency, and extends the life of your vehicle.
Signs Your Air Filter Needs Replacement
Let's see how to recognize when your air filter needs attention. Common signs include decreased acceleration, poor fuel efficiency, unusual engine sounds, and a dirty or visibly clogged filter. If you notice any of these symptoms, it's time to check your air filter.
Tools Needed for the Job
Replacing your car's air filter doesn't require an extensive toolkit. Here's a list of basic tools you'll need:
- A new air filter (specific to your vehicle's make and model)
- A screwdriver (flathead or Phillips, depending on your vehicle)
- A clean cloth or rag
- A user manual for your car (optional but helpful)
Step-by-Step Guide to Replacing Your Air Filter
1. Locate the Air Filter Housing
First, open your car's hood and locate the air filter housing. This is typically a black plastic box situated near the engine. Refer to your vehicle's manual if you're having trouble finding it.
2. Open the Air Filter Housing
Use the appropriate screwdriver to remove the screws or clips holding the housing together. Carefully lift the cover to expose the air filter. Be mindful of any attached sensors or hoses that shouldn't be disturbed.
3. Remove the Old Air Filter
Take out the old air filter and inspect it. If it's covered in dirt and debris, it's definitely time for a replacement. Use a clean cloth to wipe away any dust or debris from the housing.
4. Install the New Air Filter
Place the new air filter in the housing, ensuring it fits snugly and correctly. The filter should sit flush without any gaps. Replace the cover and secure it with the screws or clips you removed earlier.
5. Close the Hood and Test
Close the hood of your car and start the engine. Listen for any unusual sounds and check if the engine runs smoothly. Take your car for a short drive to ensure everything is functioning correctly.
Benefits of Replacing Your Air Filter at Home
Doing it yourself saves money and gives you a better understanding of your vehicle's maintenance needs. It's a quick and straightforward task that can prevent larger issues down the road. You gain the satisfaction of taking care of your vehicle, ensuring it stays in top shape.
Common Mistakes to Avoid
While replacing your air filter is a simple task, there are common mistakes you should avoid:
- Using the Wrong Filter: Always use the correct air filter for your vehicle's make and model.
- Improper Installation: Ensure the filter is properly seated, and the housing is securely closed.
- Neglecting Regular Checks: Don't wait for performance issues to check your air filter. Regular inspections are key.
How Often Should You Replace Your Air Filter?
The frequency of air filter replacement depends on your driving conditions. Generally, it's recommended to replace it every 12,000 to 15,000 miles. However, if you frequently drive in dusty or polluted environments, you might need to replace it more often. Regular maintenance checks will help you determine the best schedule for your specific vehicle.
Don't wait for performance issues to arise! Schedule your air filter inspection at Don Lee's Tire & Auto and keep your car in top shape.